Singer Overlocker 14SH754 Review
The same Singer Overlocker 14SH754 model is available through Amazon and other online retailers at almost double this money. Then I read the reviews. Although generally favourable, there was a bit of doubt too. However, in need of a new overlocker for use at home, I let my curiosity get the better of me
The New Arrival
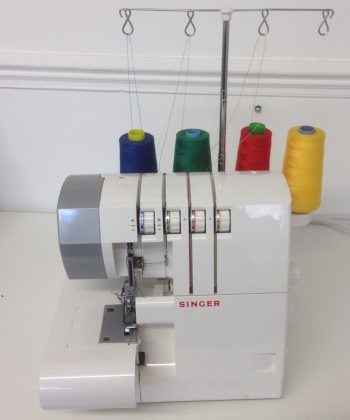
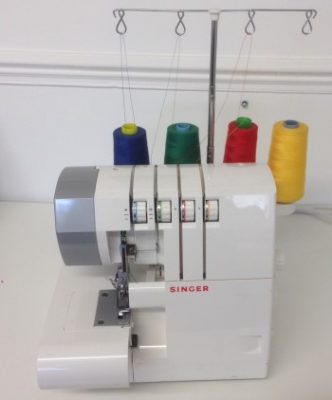
When I unpacked it, it doesn’t come with thread cones. It has been threaded but the ends have been cut off. There is also no cover or carrying case (so there’s my first project). There are long-nosed tweezers, a screwdriver, the converter, spare needles and the instruction manual.
How to thread an overlocker.
To re-thread an overlocker that is already threaded, do not remove the existing threads. Instead, snip the existing threads above the cones and remove. Replace with the new cone colours and tie on the thread ends. Then pull the new threads through the guides in the thread mast, the tension discs and the loopers. You’ll need to snip the knots in the needle threads and re-thread the needles. I threaded up using 4 different colours corresponding to the colour-coded looper and needle functions i.e blue thread for the ‘blue’ needle, etc. I consider this the best way of understanding what each part does and it’s easy to tell which thread tension needs adjusting. There’s a handy coloured diagram inside the front cover too. If you do have to re-thread the loopers at any time, it’s a handy ‘lay-in’ system but you must follow the order specified.
Initial Trials
First off, I tried the 4-thread stretch safety stitch. Some of the reviews said this machine is noisy and clunky. Well yes I have to agree. It stitched a decent, even seam with all 4 thread tensions well-balanced. So then a 3-thread overlock seam? Using the screwdriver provided I removed one of the needles in seconds. Then took out the upper looper thread, adjusted the lower looper tension and again, achieved a smooth and strong seam. However, any time I changed threads or settings, it took a bit of fiddling to get a good-quality stitch. There was a tendency for the looper threads to hang off the fabric edge.
What is Flatlock?
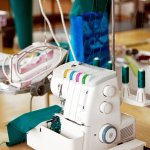
Now to try the 3 thread flatlock stitch. Flatlock is a great design feature to achieve a casual, sporty look, particularly when it’s done using bulky nylon thread. I didn’t have any to hand so I stuck with the existing standard polyester thread already in. My first couple of tries weren’t great. The needle thread was too tight to allow the fabric edges to open out completely and lie adjacent to one another. A notch or two less tension and I achieved a satisfactory effect. The needle thread has to be really loose so you can pull open the seam. After a bit of further manipulation, I achieved a good flat seam on a T-shirt sleeve. This would give your leisurewear a colourful accent and it looks so professional.
How to sew rolled hems
I was also keen to check out the rolled hem functions. My existing overlockers need a different foot or needle plate to do rolled hems. So I sometimes make excuses not to do it! Something that put me off buying this Singer overlocker initially was a comment in an Amazon review that it didn’t come with a rolled hem foot. This had to be purchased separately for an additional £25.
However, overlockers have moved on a bit in recent times. In actual fact, you don’t need an extra foot. Like most modern overlockers, there’s a built-in rolled hem setting. You slide an lever to retract the stitch finger from the needle plate. So instead of the threads forming a chain around the stitch finger, they wrap around the fabric edge instead.
3-thread rolled hem
The manual contains instructions for a 3 thread rolled hem. The index at the beginning of the manual doesn’t list this option. But this is a fairly standard function of an overlocker. You use 1 needle and both looper threads. You need to loosen the upper looper tension to around 3, and tighten the lower looper thread to around 7. The upper looper thread will wrap the fabric edge whilst the tighter lower looper pulls the edge under. If you reduce the stitch length to 2mm or less, then the thread will cover the fabric, giving an attractive edge. I achieved a neat 3mm rolled edge.
2-thread rolled hems
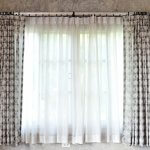
To use the overlocker with 2-threads, you use one needle and the lower looper. Remove the upper looper thread and fit the converter spring into the upper looper. This is a bit fiddly to do for the first time but easy after that. The converter makes the lower looper thread also function as the upper looper thread. The 2-thread function is suitable for very lightweight fabrics as it reduces thread bulk. Either 2-thread or 3-thread would be suitable for fine chiffon scarves or an organza skirt hem but you should experiment with both.
Other features with 3 threads
Another ‘find’ from reading the manual was pin tucks using the 3 thread overlock stitch. After a minute or two of readjustment which includes turning the knife to its non-operating position, I gave it a try. My first attempt wasn’t good (too loose and ‘loopy’) so I tweaked the tension dials again. On the 3rd attempt, I achieved narrow pin tucks. I’d also changed thread colour to match the fabric by this time too. I hadn’t considered attempting pin tucks on an overlocker before so I can see miles of creative potential now!
All this playing took just an hour as I found threading and changing functions fairly easy. My tip would be to keep the manual close and refer to it often as you’ll never remember all the individual settings. As a quick guide the ‘Overview Chart’ on page 10 is useful.
Free-Arm mode
The flat bed area on the left of the machine doubles as an accessories case. To remove it, you need to push a clip underneath and slide it off. This leaves a free-arm for small areas such as armholes or hemming cuffs.
The Downside…
One minor annoyance is that I found the plastic accessories case tricky to remove. There’s a clip underneath that needs pressed while using the other hand to pull it off. Fiddly! Also, I foolishly allowed the lower looper to become unthreaded. Note to self: NEVER do this again! It’s tricky to re-thread as the looper is tucked away in the depths of the machine and is difficult to access but the tweezers help.
Another adverse comment from an online review was that it didn’t cope with heavy fabrics such as denim. I’ve found it fine up to 3 or 4 layers of regular craft cotton but really struggles on more.
Singer Overlocker 14SH754 – Overall
Even at the full recommended price of around £249, this is still a budget-level machine. With professional-quality models starting at prices around £400 and up to £2000, don’t expect this machine to be their equal. If you’re needing an overlocker for upholstery or multiple layers of denim, then you’ll have to spend a lot more to get a heavy-duty one. You could consider Pfaff or Juki who are better known for making industrial overlockers but make excellent domestic ones too.
If you like dressmaking but have never used an overlocker, I’d advise you to get one immediately, but not this one. Even if you only use it to neaten the seam allowances, it will greatly improve the appearance of your garments giving them a professional look. However overlockers can seam the garment and finish off the edges in one operation. With sewing speeds of up to 1300-1500 stitches per minute, you could make up whole garments in less than half the time you’d take using conventional sewing machine. But their real value is in sewing stretch knits so if you want to make T-shirts, jersey dresses or leggings, then I’d say an overlocker is a must-have. Tell that to Santa!
I regularly run a short class called ‘Know Your Overlocker‘. This will teach you how to thread up your overlocker and understand the different effects you can achieve by changing the tension settings and thread set up. It includes using your overlocker with 4, 3 or 2 threads to achieve a wide range of sewing functions and decorative effects. How to achieve correct overlocker tension.
*Update August 2018*
Initially this machine worked passibly well for the first year, although it doesn’t give the stitch quality of my other overlockers. Then it developed a problem where the looper tensions were too loose. The normal setting should be around 4-5 but I had them turned up to 8-9 before achieving the required tension. I returned it to Singer and it was ‘mended’ and returned to me quickly. The tension dial problem was apparently fixed but almost immediately the left needle started skipping stitches. Singer advised to change the needle. This problem is continuous regardless of whether it’s a new needle of not, and it takes me an hour of fiddling every time I want to use the machine, to achieve anything like a reasonable stitch quality. As a professional who’s an experienced overlocker user, and the owner of 3 other machines which all perform perfectly (one of them is over 40 years old), I do not recommend this machine. Through running my Overlocker workshops, I see a good many of this model, and also it’s successor, the S14-78. Compared to the many other makes I see regularly, Singers are by far the most troublesome. Therefore I feel qualified to say that the 14SH754 is a poor-quality machine that’s not fit for purpose. The S14-78 is marginally better but still doesn’t have a good-quality stitch. Both feel light and flimsy and it’s my opinion that the resulting vibration is what causes the inconsistent stitch tension and quality. If you’re a first-time user then you may not be aware of the difference but I doubt these machines will last you more than a year or two. And are only good for occasional light use.
My recommendation is to pay a little more and get one of the following:
Janome 9300DX at £269, or Britannia 4DR £269 (made by Juki who are famed for high-quality industrial machines). Juki is also highly-recommended by my local specialist dealer, Pembertons.
None of the above-listed overlockers have the ability to sew with 2-threads to avoid bulky seams on ultra-light fabrics. So if this is something you’d like to do, then you’ll need to look at the Janome 6234XL (£399), the Elna 664 pro (£399) or Pfaff Hobbylock series from £369. One of the most robust brands of domestic overlockers around are Juki because they use there industrial technology in their domestic machines. Juki MO-644D Overlocker review


One reply on “Singer Overlocker 14SH754 Review”
[…] this example, I’m using the Singer 14SH754, so my threads are the following […]